be
/api为统一前缀
fe
cookie没有要求的话以根域为基础

( ´ ▽ ` )ノ`)
Welcome to the Tekton Pipeline tutorial!
This tutorial will walk you through creating and running some simpleTasks & Pipelinesand running them by creatingTaskRuns and PipelineRuns.
Before starting this tutorial, please install the Tekton CLI.
Note: This tutorial can be run on a local workstation
The main objective of Tekton Pipelines is to run your Task individually or as a
part of a Pipeline. Every Task runs as a Pod on your Kubernetes cluster with
each step as its own container.
A Task defines the work that needs to be executed, for example the
following is a simple Task that will echo hello world:
1 | apiVersion: tekton.dev/v1alpha1 |
The steps are a series of commands to be sequentially executed by the Task.
A TaskRun runs the Task you defined. Here is a simple example
of a TaskRun you can use to execute your Task:
1 | apiVersion: tekton.dev/v1alpha1 |
To apply the yaml files, use the following command:
1 | kubectl apply -f <name-of-file.yaml> |
To see the output of the TaskRun, use the following command:
1 | tkn taskrun describe echo-hello-world-task-run |
You will get an output similar to the following:
1 | Name: echo-hello-world-task-run |
The status of type Succeeded shows that the Task ran successfully.
To see the actual outcome, use the following command:
1 | tkn taskrun logs echo-hello-world-task-run |
You will get an output similar to this:
1 | [echo] hello world |
In more common scenarios, a Task needs multiple steps with input and output
resources to process. For example a Task could fetch source code from a GitHub
repository and build a Docker image from it.
PipelineResources are used to define the artifacts that can be
passed in and out of a Task. There are a few system defined resource types ready
to use, and the following are two examples of the resources commonly needed.
The git resource represents a git repository with
a specific revision:
1 | apiVersion: tekton.dev/v1alpha1 |
The image resource represents the image to be
built by the Task:
1 | apiVersion: tekton.dev/v1alpha1 |
The following is a Task with inputs and outputs. The input resource is a
GitHub repository and the output is the image produced from that source. The
args of the Task command support variable substitution so that the definition of Task is
constant and the value of parameters can change in runtime.
1 | apiVersion: tekton.dev/v1alpha1 |
Before you continue with the TaskRun you will have to
create a secret to push your image to your desired registry.
To do so, use the following command:
1 | kubectl create secret docker-registry regcred \ |
To be able to use this secret the TaskRun needs to use a ServiceAccount.
The ServiceAccount should look similar to this:
1 | apiVersion: v1 |
You need to put your new ServiceAccount into action, to do so, use the following command:
1 | kubectl apply -f <name-of-file.yaml> |
Now you are ready for your first TaskRun.
A TaskRun binds the inputs and outputs to already defined PipelineResources,
sets values to the parameters used for variable substitution in addition to executing theTask steps.
1 | apiVersion: tekton.dev/v1alpha1 |
To apply the yaml files use the following command, you need to apply the twoPipelineResources, the Task and TaskRun.
1 | kubectl apply -f <name-of-file.yaml> |
To see all the resource created so far as part of Tekton Pipelines, run the
command:
1 | kubectl get tekton-pipelines |
You will get an output similar to the following:
1 | NAME AGE |
To see the output of the TaskRun, use the following command:
1 | tkn taskrun describe build-docker-image-from-git-source-task-run |
You will get an output similar to the following:
1 | Name: build-docker-image-from-git-source-task-run |
The status of type Succeeded shows the Task ran successfully and you
can also validate the Docker image is created in the location specified in the
resource definition.
If you run into issues, use the following command to receive the logs:
1 | tkn taskrun logs build-docker-image-from-git-source-task-run |
A Pipeline defines a list of Tasks to execute in order, while
also indicating if any outputs should be used as inputs of a following Task by
using the from field and also indicating
the order of executing (using the runAfter and from fields).
The same variable substitution you used in Tasks is also available in a Pipeline.
For example:
1 | apiVersion: tekton.dev/v1alpha1 |
The above Pipeline is referencing a Task called deploy-using-kubectl which
can be found here:
1 | apiVersion: tekton.dev/v1alpha1 |
With the new Task inside of your Pipeline,
you need to give your ServiceAccount additional permissions to be able to execute the run-kubectl step.
First you have to create a new role, which you have to assign to your ServiceAccount,
to do so, use the following command:
1 | kubectl create clusterrole tutorial-role \ |
Now you need to assign this new role tutorial-role to your ServiceAccount,
to do so, use the following command:
1 | kubectl create clusterrolebinding tutorial-binding \ |
To run the Pipeline, create a PipelineRunas follows:
1 | apiVersion: tekton.dev/v1alpha1 |
The PipelineRun will create the TaskRuns corresponding to each Task and
collect the results.
To apply the yaml files use the following command, you will need to apply thedeploy-task if you want to run the Pipeline.
1 | kubectl apply -f <name-of-file.yaml> |
While the Pipeline is running, you can see what exactly is happening, just use the following command:
1 | tkn pipelinerun logs tutorial-pipeline-run-1 -f |
To see the output of the PipelineRun, use the following command:
1 | tkn pipelinerun describe tutorial-pipeline-run-1 |
You will get an output similar to the following:
1 | Name: tutorial-pipeline-run-1 |
The status of type Succeeded shows the Pipeline ran successfully, also
the status of individual Task runs are shown.
Tekton Pipelines is known to work with:
host.docker.local:5000 as an insecure registry with Docker for--insecure as an argument to Kaniko tasks lets us push to andocker run -d -p 5000:5000 --name registry-srv -e REGISTRY_STORAGE_DELETE_ENABLED=true registry:2
docker run -it -p 8080:8080 --name registry-web --link registry-srv -e REGISTRY_URL=http://registry-srv:5000/v2 -e REGISTRY_NAME=localhost:5000 hyper/docker-registry-web
host.docker.internal:5000/myregistry/<image name> equivalentsKO_DOCKER_REPO variable should be set to localhost:5000/myregistrykohost.docker.internal:5000/myregistry/<image name>localhost:5000/myregistry/<image name>Elasticsearch, Beats and Kibana can be deployed locally as a means to view logs:
an example is provided at
https://github.com/mgreau/tekton-pipelines-elastic-tutorials.
Lines of code you may want to configure have the #configure annotation. This
annotation applies to subjects such as Docker registries, log output locations
and other nuances that may be specific to particular cloud providers or
services.
The TaskRuns have been created in the following
order:
tutorial-pipeline-run-1-build-skaffold-web - This runs thebuild-skaffold-web first,from or runAfter clausestutorial-pipeline-run-1-deploy-web - This runs deploy-web second, becauseweb-image comes frombuild-skaffold-web (therefore build-skaffold-web must run beforedeploy-web).1 | xcode-select --install |
1 | /usr/bin/ruby -e "$(curl -fsSL https://raw.githubusercontent.com/Homebrew/install/master/install)" |
Install software
1 | # IDE |
1 | vim ~/.vimrc |
FileReader 对象允许Web应用程序异步读取存储在用户计算机上的文件(或原始数据缓冲区)的内容,使用 File 或 Blob 对象指定要读取的文件或数据。
File 对象是来自用户在一个 input 元素上选择文件后返回的 FileList 对象,也可以是来自由拖放操作生成的 DataTransfer 对象,或者来自 HTMLCanvasElement 上的 mozGetAsFile() API。
Blob 对象表示一个不可变、原始数据的类文件对象。Blob 表示的不一定是JavaScript原生格式的数据。File 接口基于Blob,继承了 blob 的功能并将其扩展使其支持用户系统上的文件
1 | const woffUrl = chrome.extension.getURL('/libs/fonts/element-icons.woff'); |
一个很简单的功能直接导致页面卡死
1 | const arr = []; |
尝试在控制台运行以上代码…
JavaScript 使用一个32位整数,保存数组的元素个数。这意味着,数组成员最多只有 4294967295 个(232 - 1)个,也就是说length属性的最大值就是 4294967295。
1 | var arr = ['a', 'b']; |
数组的遍历会从索引 0 开始一直到 length-1
所以,以下代码往往不可控
1 | let key: number; |
对数组以一个 number 类型的变量作为 key 赋值后,再使用 map, forEach, for... 等来遍历数组时,由于 key 的值不可控,如果是数据库中的 主键id,那么在数据量小的时候发现不了什么异常,一旦数据量过大,浏览器直接就会卡死!
1 | cat /etc/issue |
1 | # 内核信息 |
到官网kernel.ubuntu.com下载对应deb文件
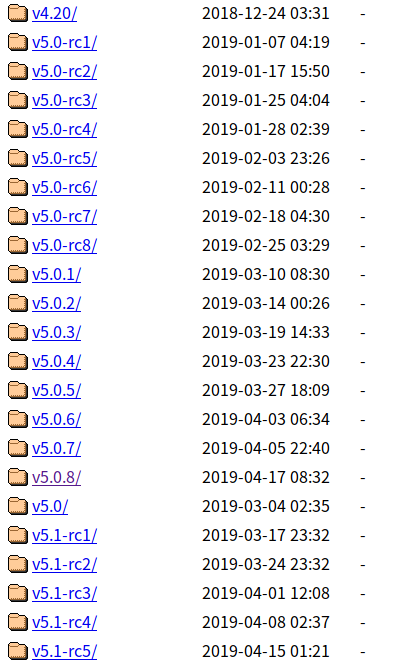
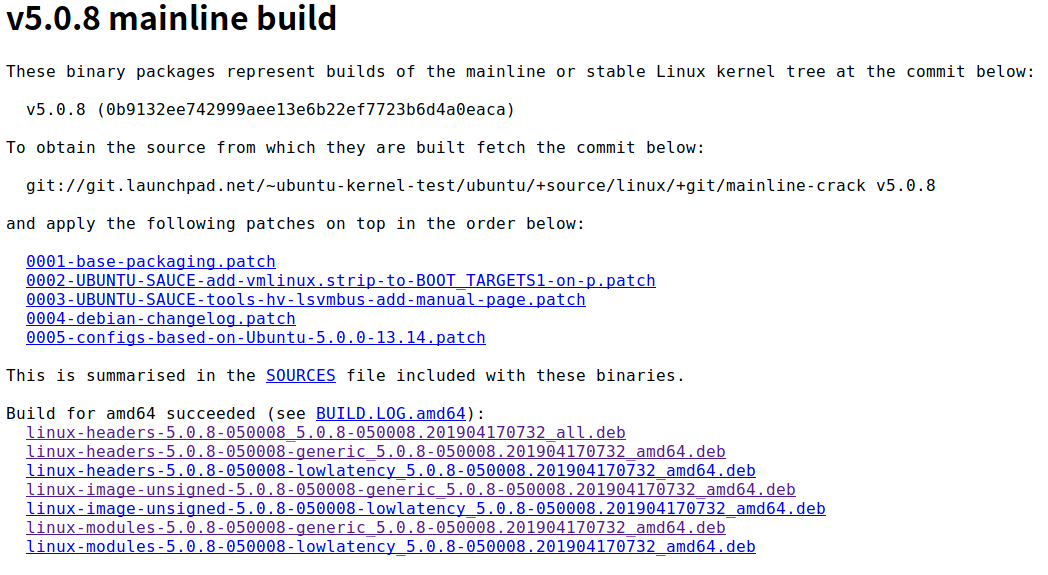
下载 *all.deb 和所有 *generic*.deb 文件后,到对应文件夹下执行
1 | sudo dpkg -i *.deb |
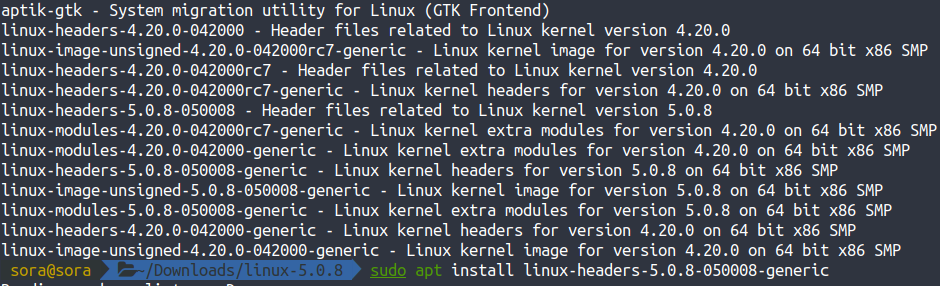
我是64位操作系统所以选择的
amd64,32位的小伙伴选i386即可
1 | apt-cache search linux |
1 | sudo apt install linux-headers-5.0.8-050008-generic |
安装完成后默认启动最新内核
1 | # 查看内核启动顺序 |
1 | sudo apt-get autoremove |
路由在切换时需要销毁当前组件,这在大多数情况下是符合预期的。但是有些时候在一些列表 + 详情的结构下,进入详情后再返回列表需要保留之前的列表状态,此时就需要缓存列表路由。
1 | // route-reuse.strategy.ts |
1 | // app-routing.module.ts |
1 | // 任意一个页面组件 |
同一父路由 下的子路由之间的跳转会重新初始化 parent component。翻了翻源代码这才找到了答案。
Provides a way to customize when activated routes get reused. code
1 | export abstract class RouteReuseStrategy { |
官方默认的 ReuseStrategy 如下
1 | /** |
对比发现 shouldReuseRoute 中的判断条件不一样。于是将原有代码做了一些调整
1 | shouldReuseRoute(future: ActivatedRouteSnapshot, curr: ActivatedRouteSnapshot): boolean { |
此时同一父路由下的子路由之间的跳转不会再初始化父组件了。
1 | <link rel="stylesheet" href="https://imsun.github.io/gitment/style/default.css"> |
1 | <script src="https://imsun.github.io/gitment/dist/gitment.browser.js"></script> |
or via npm:
1 | $ npm i --save gitment |
1 | import 'gitment/style/default.css' |
注意 http 和 https
1 | const gitment = new Gitment({ |
出现这个错误一般有两个原因
这个问题稍微复杂一点,简单一点的方案是直接替换 gitment.browser.js的路径
1 | <link rel="stylesheet" href="//lovesoraliu.github.io/gitment/style/default.css"> |
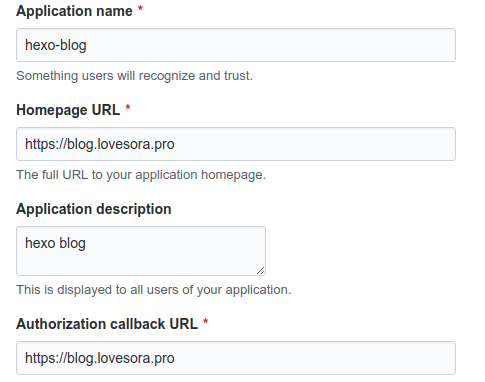
如果想要自己折腾的话略微有些麻烦,大致步骤如下
在自己服务器上clone gh-oauth-server, 执行
1 | 端口号默认是3000 |
启动 gitment server
fork gitment, clone fork的代码到本地,切到 gh-pages 分支
将 https://gh-oauth.imsun.net 改为自己服务器的 http(s) + domain or ip + port。
1 | _utils.http.post('https://gh-oauth.imsun.net', { |
1 | _utils.http.post('https://gitment.soraliu.devlovesora.pro', { |
将刚才的改动 push 至 github,再修改 gitment.browser.js 的url 即可
1 | <link rel="stylesheet" href="//[username].github.io/gitment/style/default.css"> |
1 | $ yarn add hexo-filter-mermaid-diagrams |
In your blog floder, not hexo floder
After installed, you should edit hexo config file: _config.yml:
1 | # mermaid chart |
❗️❗️❗️Notice: if you want to use ‘Class diagram’, please edit your ‘_config.yml’ file, set
external_link: false. - hexo bug.
After edited _config.yml, you shou edit your blog page component like after_footer.pug , after-footer.ejs or swig.
Where is it?
Open your theme folder, you can see the layout folder, open it and then you could see it.
Okey! if your blog is used pug, you can copy the below codes in after_footer.pug:
1 | if theme.mermaid.enable == true |
after-footer.ejs should copy below codes:
1 | <% if (theme.mermaid.enable) { %> |
swig template engine:
1 | {% if theme.mermaid.enable %} |
缺失模块。
1、请确保node版本大于6.2
2、在博客根目录(注意不是yilia根目录)执行以下命令:
npm i hexo-generator-json-content --save
3、在根目录_config.yml里添加配置:
  jsonContent:
    meta: false
    pages: false
    posts:
      title: true
      date: true
      path: true
      text: false
      raw: false
      content: false
      slug: false
      updated: false
      comments: false
      link: false
      permalink: false
      excerpt: false
      categories: false
      tags: true